Kubernetes Deployment: A Practical Guide from Zero to Production
Containers already solved the "it works on my machine but breaks on the server" problem. But once you have more than one container that needs to talk to each other, scale up and down, and stay alive even when something crashes, you need more than a plain docker run. That's where Kubernetes comes in.
This article walks through deploying an application to Kubernetes in practice: from the core concepts, to creating a Deployment, exposing it through a Service, managing environment variables and secrets, scaling, rolling updates, and the troubleshooting steps you'll actually use.
Why Kubernetes, not just Docker
Docker is great for running a single container. But as your application grows, a few questions come up that Docker alone can't answer:
- If a container dies, who brings it back?
- If traffic spikes, how do you add more instances without downtime?
- How do containers find each other on the network?
- How do you roll out a new version without killing the old one first?
Kubernetes answers all of this through a declarative model: you describe the desired state (for example, "I want 3 replicas of this app running at all times"), and Kubernetes continuously works to keep the actual state matching what you described.
Prerequisites
Before you start, make sure you have:
- Docker — to build your application image
- kubectl — the command-line tool for talking to a Kubernetes cluster
- Access to a Kubernetes cluster (local, like Minikube or Kind, or managed, like GKE, EKS, or AKS)
- A basic understanding of containers and images
Check your cluster connection with:
kubectl cluster-info
kubectl get nodes
If this returns node information without errors, your cluster is ready to go.
Core concepts you need first
Before writing any YAML, a few terms will keep showing up:
| Term | What it means |
|---|---|
| Pod | The smallest unit in Kubernetes — one or more containers running together |
| Deployment | Manages a set of Pods, keeping the replica count correct and handling updates |
| Service | Gives a stable network address for reaching a set of Pods |
| ConfigMap / Secret | Stores configuration and sensitive data separately from the image |
| Namespace | A logical isolation boundary for grouping resources within a cluster |
Creating a Deployment
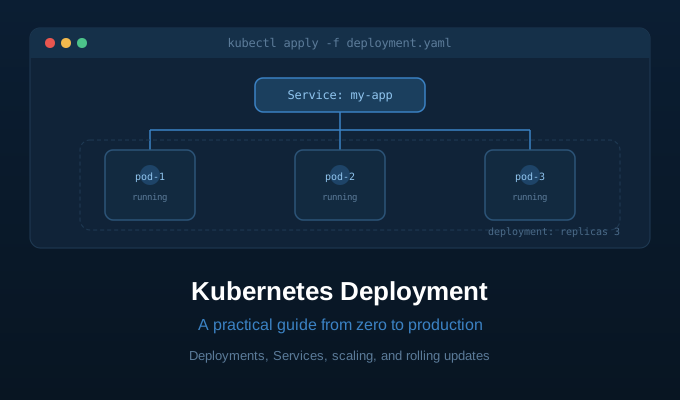
A Deployment is the standard way to run stateless applications on Kubernetes. Here's a more complete example than a bare replica count:
apiVersion: apps/v1
kind: Deployment
metadata:
  name: my-app
  labels:
    app: my-app
spec:
  replicas: 3
  selector:
    matchLabels:
      app: my-app
  template:
    metadata:
      labels:
        app: my-app
    spec:
      containers:
      - name: my-app
        image: my-app:latest
        ports:
        - containerPort: 8080
        resources:
          requests:
            cpu: "100m"
            memory: "128Mi"
          limits:
            cpu: "500m"
            memory: "256Mi"
        readinessProbe:
          httpGet:
            path: /healthz
            port: 8080
          initialDelaySeconds: 5
          periodSeconds: 10
        livenessProbe:
          httpGet:
            path: /healthz
            port: 8080
          initialDelaySeconds: 15
          periodSeconds: 20
A few things that make this different from just "run 3 replicas":
resources.requestsandresources.limitstell the scheduler how much CPU and memory each Pod needs, and stop a single Pod from starving the rest of the node.readinessProbemakes sure traffic is only routed to Pods that are actually ready to serve requests, not ones still starting up.livenessProbelets Kubernetes automatically restart a container that's hung or deadlocked, even if the process technically still looks "alive."
Apply the configuration to your cluster:
kubectl apply -f deployment.yaml
Check its status:
kubectl get deployments
kubectl get pods -l app=my-app
Exposing the app with a Service
A Deployment alone doesn't make your app reachable. Pods can die and get recreated with new IPs at any time, so you need a Service as a stable address in front of them:
apiVersion: v1
kind: Service
metadata:
  name: my-app-service
spec:
  selector:
    app: my-app
  ports:
  - protocol: TCP
    port: 80
    targetPort: 8080
  type: ClusterIP
The three Service types you'll use most often:
- ClusterIP (default) — only reachable from inside the cluster, ideal for internal service-to-service communication
- NodePort — opens a static port on every node, typically used for testing
- LoadBalancer — asks the cloud provider to provision an external load balancer, commonly used in production to expose an app to the internet
Managing configuration with ConfigMap and Secret
Same principle covered in an earlier article on Godotenv and Viper configuration shouldn't be baked into the image. In Kubernetes, this is handled through ConfigMap (for non-sensitive data) and Secret (for sensitive data like passwords or API keys):
kubectl create configmap app-config --from-literal=APP_ENV=production
kubectl create secret generic app-secret --from-literal=DB_PASSWORD=supersecret
Then reference them in your Deployment:
env:
- name: APP_ENV
  valueFrom:
    configMapKeyRef:
      name: app-config
      key: APP_ENV
- name: DB_PASSWORD
  valueFrom:
    secretKeyRef:
      name: app-secret
      key: DB_PASSWORD
Scaling the application
One of Kubernetes' biggest strengths is how easy scaling is, both manually and automatically.
Manual scaling:
kubectl scale deployment my-app --replicas=5
Automatic scaling based on CPU usage, via the Horizontal Pod Autoscaler (HPA):
kubectl autoscale deployment my-app --cpu-percent=70 --min=3 --max=10
With this in place, Kubernetes automatically adds Pods once average CPU usage crosses 70%, and scales back down when traffic drops, no manual intervention needed.
Rolling updates and rollbacks
When you deploy a new version, Kubernetes performs a rolling update by default replacing old Pods with new ones gradually rather than all at once, so the application stays available throughout:
kubectl set image deployment/my-app my-app=my-app:v2
kubectl rollout status deployment/my-app
If the new version turns out to be broken, rolling back is just as simple:
kubectl rollout undo deployment/my-app
Kubernetes also keeps a rollout history you can inspect:
kubectl rollout history deployment/my-app
Monitoring and debugging
A handful of kubectl commands cover most day-to-day monitoring needs:
kubectl get pods
kubectl describe pod <pod-name>
kubectl logs deployment/my-app
kubectl logs deployment/my-app --previous
kubectl top pods
kubectl describe pod is especially useful when a Pod is stuck in Pending or CrashLoopBackOff, the Events section in the output usually points straight to the cause, like an image that failed to pull or insufficient resources on the node.
Common mistakes to avoid
- Skipping resource requests/limits, one Pod can end up starving the rest of the node's resources.
- No readiness probe, traffic can get routed to a Pod that isn't ready yet, causing errors right after deployment.
- Storing secrets in a ConfigMap, ConfigMaps aren't encrypted, whereas Secrets (even though only base64-encoded by default) are at least access-separated and can be integrated with an external secret manager.
- Using the
latesttag in production, makes rollbacks harder since there's no clear version to go back to.
Conclusion
Kubernetes has a steep learning curve at first, but the underlying idea stays consistent: you describe the desired state through Deployments, Services, ConfigMaps, and Secrets, and Kubernetes keeps working to make the actual cluster state match that description.
Start simple a single Deployment with correct resource limits and health checks — before moving on to more advanced features like HPA, Ingress, or a service mesh. A solid foundation early on is worth far more than jumping straight into a complex setup.
Have you deployed to Kubernetes in production before? What was the biggest challenge, networking, resource management, or observability? Share it in the comments.